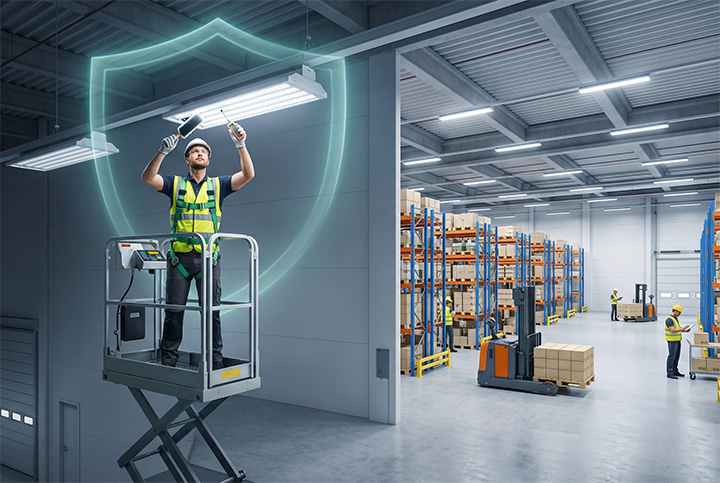
One of the most overlooked pieces of a lighting upgrade is the future life and performance of the item AFTER Installation. Lighting upgrades are not an “install and forget it” process. They need to be maintained.
A consistent lighting maintenance plan helps your business run smoothly. It reduces surprise breakdowns, keeps your lights bright and even, and cuts down on emergency repairs. It also helps you avoid premature failures, so your lighting system stays efficient and costs stay under control.
Preventive maintenance strategy (optical + electrical + thermal)
A high-performance lighting fixture maintenance program should be implemented in every business and focus on 3 main areas: optical maintenance and cleaning, electrical integrity and thermal dynamics.
The first step is an inspection.
• Lenses, diffusers, and covers
– Inspect for surface haze, micro-cracking, yellowing (UV exposure), and loss of clarity.
– Check that gaskets/seals are intact and seated evenly.
• Optical alignment
-Verify housings and reflectors are secureand not misaligned due to vibration or service impacts.
– Confirm no obstructions from cable slack, hanging signage, or ceiling soffits.
• Electrical connections
– Check for thermal discoloration at terminal blocks and connectors.
– Inspect conductor routing for abrasion and ensure strain relief is functioning.
• Driver and thermal path
– Confirm the driver is mounted correctly and has adequate ventilation.
– Inspect heat-sink fins for dust accumulation and confirm airflow pathways are unobstructed.
• Controls and sensors (if installed)
– Test occupancy/daylight sensing logic and verify dimming curves match design intent.
– Inspect control wiring for intermittent faults (flicker, dropouts, or quantization artifacts in control signals).
The next step is thorough cleaning.
Cleaning technical guide (optics-first, damage-aware)
Optical performance is highly sensitive to film buildup. Contaminants scatter and absorb light, reducing luminous flux and increasing glare.
• De-energize before service
-Power down at the appropriate breaker and verify absence of voltage.
-Allow fixtures to cool to prevent thermal shock to optics.
• Use compatible cleaning chemistry
-For most polycarbonate/acrylic lenses: use soft microfiber and natural cleaners that do not scratch polymers.
-Avoid aggressive solvents (e.g., strong acetone-like solvents) unless the fixture documentation explicitly authorizes them.
• Remove dust systematically
– Start with dry dust removal (soft brush/low-pressure air where permitted).
– Follow with a gentle wet clean only when needed to remove grease films.
• Pressure and material safety
– Do not use abrasive pads that micro-scratch diffusers.
– Keep liquids away from driver compartments and sealed junctions—use controlled application and allow full drying.
• Re-check optical output
– After cleaning, verify that fixtures are seated correctly and optics are fully installed to prevent stray-light losses.
Thermal management: keep the heat path clean
LED performance and driver longevity are tightly coupled to thermal conditions. Dust and debris act as thermal insulators, raising junction temperatures and accelerating degradation.
• Heat-sink and ventilation inspection
– Clean heat-sink fins to restore convective heat transfer.
– Ensure no insulation, ceiling debris, or wiring blocks airflow.
• Operating temperature verification
– If you maintain field instrumentation, log surface temperatures on a representative sample.
– Look for abnormal thermal gradients indicating blocked airflow, poor mounting, or compromised seals.
Electrical maintenance: connectors, drivers, and control integrity
Electrical issues often present indirectly (flicker, dimming anomalies, intermittent outages). Treat the system as an energy-control chain.
• Connector torque verification
-Where standards require it, re-check terminal tightness to prevent contact resistance rise.
-Replace connectors that show oxidation or heat discoloration.
• Driver inspection
-Confirm driver mounting integrity and that no condensation is present in driver compartments.
-For dimming drivers, validate control signal stability (where applicable, check for stable PWM/analog behavior per installation requirements).
• Circuit health checks
-Monitor for recurrent tripping, voltage instability, or persistent flicker at specific circuits.
-Isolate fixtures with repeat symptoms to differentiate fixture-level faults from upstream power quality issues.
Mechanical and environmental protection (seals, ingress, and vibration)
Fixtures in commercial spaces frequently experience grease aerosols, humidity cycling, and cleaning chemicals. Maintenance must ensure ingress protection continues to function.
• Ingress protection (IP) verification
-Inspect gaskets for compression-set or cracking.
-Check conduit entries for strain relief and sealing integrity.
• Condensation control
-If you observe fogging or droplet formation, prioritize seal integrity and verify ventilation pathways (if the fixture design relies on them).
• Vibration and mounting stability
-Re-check mounting hardware and brackets.
-Confirm that fixtures remain rigidly fixed to prevent micro-misalignment and optical drift.
Reducing business downtime: a maintenance workflow that scales
For businesses, the best maintenance plan minimizes disruption while maximizing output reliability.
• Create a “sweep” schedule
-Start with the most failure-prone areas (high dust/grease, high humidity, heavy foot traffic).
– Follow with optical cleaning and electrical spot checks in a single pass.
• Maintain a spare parts strategy
– Keep common consumables and components: replacement drivers (as allowed), compatible optical covers, gaskets, and frequently used connectors.
– Standardize part numbers across sites to reduce lead-time delays.
• Document and trend
-Track cleaning intervals, observed contamination levels, and any electrical/driver anomalies.
– Identify patterns: a location with frequent optical haze likely needs interval adjustment or environmental mitigation (e.g., filtration, airflow changes, housekeeping refinement).
Compliance and safety notes for technical operations
• Use appropriate lockout/tagout procedures.
• Follow local electrical codes and fixture manufacturer installation requirements.
• Only use cleaning methods and chemicals explicitly compatible with the fixture’s optical and housing materials.
Suggested simple maintenance schedule (baseline template)
Use this as a starting point and adjust based on your environment and operating hours.
• Monthly/quarterly (light-duty environments):
-Visual inspection of optics and covers
-Quick check of mounting stability and visible connector condition
-Targeted cleaning where dust films are evident
• Semi-annual/annual (higher contamination environments):
-Full optical cleaning
-Heat-sink/vent pathway cleaning
-Electrical connector inspection and integrity verification
-Control calibration/functional testing (if equipped)
• After incidents (vibration, storms, chemical exposure, or cleaning events):
-Immediate seal and ingress inspection
-Electrical and thermal check for any abnormal behavior
-Verification of optic seating/alignment
A technically rigorous maintenance plan preserves lumen output and optical uniformity. It also ensures electrical safety. The result is consistent visibility and a safe environment.
Buying the fixtures and installing them are the first step. Maintaining them and the system will ensure years of satisfaction with your purchase.